Tuesday 30 October 2012

Toasted Walnut and Aragula Salad with Dijon Vinaigrette


This wholesome salad is the perfect solution if you're craving a light meal. Packed with nuts and avocado, this mix will be enough to satiate you but light enough to not be overwhelming. With a light vinaigrette and lots of flavour, there is only one word that can truly describe this mix: satisfying.

Serves one as a meal or two as a side
Ingredients:
2-3 cups arugula
2 radishes
2 green onions
1 avocado
¼ c. crushed walnuts
1 sprig of mint (fresh or dry)
2 tsp Dijon Mustard
1 tsp red wine vinegar
1 tsp olive oil
Salt/pepper to taste

 1) Roast walnuts at 325 degrees in a toaster over for 5 min., checking occasionally for burning, remove from oven let cool 10 minutes.
2) Wash arugula and mint, rinse and dry
3) Slice radishes thinly, chop green onions and cut avocado into bite side pieces (If you aren't familiar with this method, consider halving the avocado by length, removing the pit and cutting a checkerboard pattern into each half of the avocado, once flipped out of the skin this will yield perfect little bite-sized pieces).
4) Mix mint and arugula, coat with sliced vegetables
5)Whisk Dijon and wine vinegar until thoroughly homogenous, drizzle the oil into the mix slowly (the mustard acts similarly to eggs as an emulsifying agent as seen in mayonnaise), once thoroughly mixed, pour onto salad.
6) Season with salt and pepper and serve.

Thursday 25 October 2012

Tofu with Mixed Vegetables and Basil

This quick stir fry is similar to the shrimp stir fry I posted earlier but is faster and can be made from things that store well in the fridge. It is to me an absolutely ideal post-workout lunch, one that is jam packed with lean proteins all the while being quick and tasty. This recipe is meant to be a basic template, you can use all sorts of different veggies in this mix so don't let yourself be limited by what I post here! This recipe is far from perfect with vegetables not necessarily being perfectly cooked but the point of this recipe is simplicity and speed as well as thriftiness! Keep what vegetables you are using in mind with mushrooms, peppers and onions cooking at close enough speeds to each other to be cooked in large chunks together while hard vegetables such as carrots, celery and broccoli needing to be chopped smaller.


Serves one hungry person alone or two people if served with rice
Ingredients:

-1/2 lb extra firm tofu, cut into similarly sized squares
-~1/2 a pepper
-1 handful of mixed vegetables ( small pieces of celery, mushrooms, thin slices of carrot made with a vegetable peeler, etc.)
-1 small yellow onion, 1-2 shallots or 3-4 green onions
-2-3 slices of ginger
-1 clove of garlic, crushed
-dried chilis to taste
-1 tsp olive oil
-2-3 tsp soy sauce
-1 tsp brown sugar (2 tsp. if you add lime juice)
-1 small splash of fish sauce
-1 small handful of fresh basil (thai basil is also excellent, it has a slight anise taste to it)
-salt and pepper to taste
-juice and zest of half a lime

1) Wrap tofu in a cloth and press tofu by letting it sit with a weight on it. Although this step is optional and can easily be skipped in a rush, this step helps the tofu absorb flavour better.
2) Cut peppers and onion into chunks that are roughly the same size as the tofu.
3)Heat oil,  crushed garlic, thin slices of ginger and chilis in a non-stick pan or wok until mixture is fragrant, add tofu slices and cook on each side until golden brown
4) Remove browned tofu and seasonings, make sure to remove the seasoning as these will taste bitter if they burn.
5) Re-oil the pan, quickly saute peppers, vegetables and onion until softened and lightly browned
6)Assemble soy sauce, fish sauce and brown sugar as well as the lime into a sauce, pour onto the vegetables, adding the tofu.
7)Heat until the sauce thickens, dust the top with basil leaves and serve hot either alone or on a bed of rice

Wednesday 24 October 2012

Roasted Garlic Hummus


Hummus is a Middle Eastern staple that many of us have come to grow and love. Earthy yet rich, hummus makes a healthy dip for chips, bread or vegetables, I tend to just dig into the bowl with a pile of carrot sticks and some cucumber slices. My spin on this tasty little concoction is the use of flavoured olive oil and roasted garlic, hope you love it as much as I do!


Ingredients:
-540 ml chickpeas (canned)
-1/4c water
-¼ c. tahini
-2 cloves garlic
-¼ tsp. salt
-Black pepper to taste
-Zest of half a lemon, juice of half a lemon (or more, to taste)
-1/4c.  aromatised olive oil (Thyme, lemon or oregano are all good in this mix!)
-Pinch of cumin and/or paprika (optional)
1)Roast cloves of garlic, in their papery outer shells, for 1 hour at 350 degrees, checking occasionally to avoid burning.
2) Drain chickpeas, rinse, pour into a blender, make sure to squeeze the garlic from its husk, it should come out easily.
3) Pulse mixture until smooth, adding water as needed, if you need more liquid, don’t hesitate to add the rest of the water. If you still need more liquid, add more oil and lemon juice.

Friday 19 October 2012

Roasted Vegetable Medley

This large mix of tasty and fragrant vegetables, herbs makes a satisfying side to a large dinner. This recipe is a substantial enough dish that could even be eaten as the main course to a vegetarian dinner. Roasting the vegetables together gives it a rich consistency that conjures images of a bountiful harvest all the while being more satisfying than many salads.


Ingredients:

Medley:
-1 head of garlic
-2 large red onions
-1-2c. Mushrooms
-3c. green beans
-2 c. carrots
-1-2 sprigs each of fresh rosemary and thyme
-1 tbsp. brown sugar
-1-2 tsp. lemon juice
-Shake of garlic powder
-Ample amounts of salt and freshly ground black pepper
-1/2c. roasted walnuts crushed (optional)
-Handful of fresh basil leaves (optional)


1) With a very sharp knife, chop head of garlic down the middle horizontally to expose the cloves. The cut must be made quickly to prevent the cloves from separating from the head, if one or two cloves fall off, crush them finely and add them to step 3
2) Chop red onions, mushrooms, beans and carrots into similarly sized chunks
3) Coat  chopped vegetables generously by mixing by hand in a bowl with the olive oil, salt, pepper, rosemary, thyme, garlic powder, lemon juice and brown sugar
4) Pour into a casserole pan and bake at 350 for 1 hour, monitoring occasionally to check for burning
5) Remove from oven, check if vegetables are cooked enough, if they aren't don't hesitate to return them to the oven.
6) As soon as the vegetables are ready  coat with nuts and basil leaves, serve hot

Ginger Squash Soup

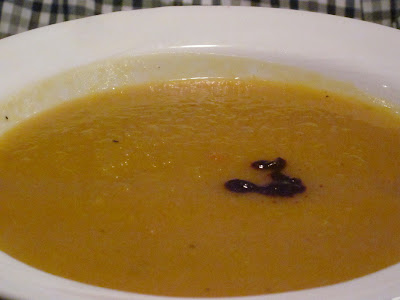
This was one of the recipes I prepared for our lovely thanksgiving dinner. Mixing the velvety sweet consistency of pureed squash with the zing of fresh ginger, the result is a deeply satisfying and heartwarming soup. Best made with Hubbard squash, a rather uncommon heirloom variety, this soup can also be made with squash of the butternut variety, it won't be the end of the world.


Serves 16-20 as a first course (Don't hesitate to halve the recipe!)
Ingredients:
-~2.2 kg  Peeled squash
-6 Onions
-5 Cloves of garlic
-4 Sticks of celery
-1/2 a red pepper
-2 Bay leaves
-2-3 inches of ginger
-1L Chicken Broth
-1 tbsp. olive oil
-1/2c. water (more if needed)
-3tbsp. Soy sauce
-1 Splash or Worcestershire sauce
-A few drop of sriracha or other hot sauce (optional)

1)Halve squash and bake for 1 hour on a baking sheet at 350 until you can sink a fork deep into the flesh with relatively no effort, let sit to cool for about 30 min. before beginning the recipes
2) Chop onions, garlic, ginger, red pepper, celery.
3) Fry onions, celery, garlic and ginger in olive oil in the bottom of a large pot (in which you will later make the soup) until soft and fragrant, add red peppers
4) Peel squash by removing the flesh from the skin with a spoon, add it to the vegetables alongside the broth and water, let simmer for 5 minutes
5) Add all remaining ingredients except the sriracha sauce to the soup, heat at medium heat for at least half an hour allowing the flavours to melt, season with salt and pepper to taste.
6) Remove bay leaves and blend using either a stand blender or an immersion blender.
7) Garnish with hot sauce and serve

Thursday 11 October 2012

Chocolate Pear Cake

Sorry folks for the delay in posting! To make up for it, here's the recipe for that succulent looking chocolate pear cake that I posted in our Thanksgiving post. This cake is a fantastic marriage of luxurious, velvety chocolate and melt in your mouth fresh autumn pears. By incorporating this fall flavour with the sophistication of dark chocolate you can manage to bring a little class to your Autumn feast! So without further ado...


Cake (Adapted from my friend Jaana's recipe)
Ingredients:
-3c.+3 tsbp. milk
-1/3c. cocoa
-1 1/2c. butter
-3 eggs
-2 1/2c. brown sugar
-1/2 tsp. salt
-3 tsp. vanilla
-1 1/2 tsp. baking powder
-3c. flour
-3tsp. baking soda

For the ganache:
-250g. Dark Chocolate (I used 72% Swiss)
-~1/2 c. 10% coffee cream

For the filling:
4c. of pears, peeled and cored

1) Grease 2 round 8 inch cake pans, preheat oven to 350 degrees
2) Heat 3c. milk with cocoa, at low heat, whisking until well mixed, remove from heat, let cool
3) Combine flour, salt and baking powder, in a separate bowl beat butter and sugar together, add eggs and vanilla
4)Mix dry ingredients, cocoa liquid and egg mix, with a mixer, combine until homogenous
5)In a separate container mix baking powder and remaining milk, make sure it doesn't clump, add it to the batter, pour into moulds, bake for 30-40 minutes
6) Prepare the pears, peeling, coring and then add to a pot, heat on medium heat stirring and mashing until they are a thick puree, if they are sticking too much add some butter and keep mixing. Set  mixture aside to cool
7)One the cake has been ejected from its pan and it, along with the pear mix, has cooled begin to work on the ganache, melting the dark chocolate in 1/4c. of the cream adding 1-2 tbsp. as needed
8)Set up one layer of cake, apply a layer of ganache on top of it and let cool. Once it has cooled layer pears on top followed by more cake* repeat the process on the top layer, putting down ganache and pear mixture.
9) Coat the sides of the cake with a thin layer of ganache. By this point, you should be left with some ganache and some cream**melt down the rest of the ganache with the cream to make a thinner, lighter liquid, this is what you can use to drizzle a decorative motif along the top of the cake, be original!

Tadaa! A lovely cake, as usual, feel free to decorate as you please!


Many thanks to Cody again for the fantastic pictures!

*if you make additional ganache and pear and split the cake into thinner rounds using dental floss or a knife you can add more layers, this is a great cake for layering as you'll see in a later recipe!
** if you were too generous, don't worry just melt down another 50g of chocolate or so with the remaining cream

Saturday 6 October 2012

Thanksgiving

Today we celebrated the epitome of Autumn, Thanksgiving (Real Thanksgiving, in October, Canadian style!). My dear friend Cody was kind enough enough to bring his big shiny camera over to my parent's house and we did a little shoot. Recipes will be coming soon, hope you enjoy the pictures guys, and happy Thanksgiving!!!

 
A family classic, Rum Punch
My girlfriend Shannon and Cody set the table and decorated it alongside my mother making the perfect atmosphere for our cozy little gathering.

Some fine crystal helped put a touch of class to the whole affair.


Some leaves helped bring a touch of Autumn inside (Shhh...those ones might not be real, our secret)


And apparently there should be pictures of me on the blog so here are a few, thanks to Cody again.


I can never, ever, keep a straight face while being photographed...ever

Now onto the food for a bit...

What would the world be like without bread?

Chocolate Pear Layer Cake

Nut Apricot and Bread Stuffing

No Thanksgiving would be complete without some of mum's delicious apple pie!


Check back soon for the recipes!!!

Thursday 4 October 2012

Citrus and Poppy Seed Muffins


These tasty little confections toe the dangerous line between cake and muffin, making for a lovely dessert but also being able to double as breakfast (I'm not eating cake for breakfast! Its a muffin, I swear!). However, not all lemon poppy seed muffins are created equal, these little critters are not only more nutritious than their counterparts but tend to taste more strongly of citrus. These muffins are made truly exceptional by the additional kick granted to them by the lemon syrup, inspired by Canadian Living's recipe. To top it all off, the addition of orange gives the muffins another layer of flavour all the while giving a wonderful golden tone not shared by its predecessor. Are these muffins really better than traditional lemon poppy seed muffins? Only one way to find out, get to it!


Serves 24
Ingredients

1 1/2 c. butter
2 1/4 c. granulated sugar
6 eggs
3 ½ c. all-purpose flour
1 c. wholewheat flour
9 tsp.  poppy seeds
4 tbsp.  grated lemon rind
1.5 tsp. baking powder
1/2 tsp. salt
1 1/4 c. soy milk
¼ c. orange juice concentrate (from frozen concentrate)
2 tsp. vanilla
1 tbsp. lemon juice

Lemon Syrup:
2/3 cup granulated sugar
2 tsp grated lemon rind
½ tsp orange rind
2/3c. lemon juice

1) Preheat oven to 325 degrees, grease 2 large muffin trays
2) Combine flours, baking powder and salt
3) Cream butter and sugar together until homogenous, add eggs gradually and mix
4) Add vanilla, lemon juice, orange juice concentrate to the egg mixture mixing together
5) Combine wets and dries, add poppyseeds, pour into muffin trays
6) Bake at 325 degrees for 50 minutes, test readyness with toothpick 
7) Coat baked and cooled muffins with syrup.

Plum Jam


This jam made of black plums is tart as well as tasty. It makes a nice spread for bread as well as being a filling for one of my most favorite desserts, Pączki. My grandfather once claimed that plums were one of the things he missed most from his native Croatia, so perhaps my love of plum products is genetic. Either, way, plum jam does not receive nearly enough attention in North America for some strange reason, to remedy this situation you should give it a try!

Makes ~2.25 L of plum jam
Ingredients:
-12 cups of ripe black plums, pitted
-1 ½ cups sugar
-1/8 cup rum
1) Store several spoons in the freezer before beginning, you’ll use those for evaluating how well the jam will jell
2) Three pots should be used for this recipe
-The first is used for sterilizing jars, to sterilize them, fill half the pot with water, insert the jam jars you plan on using and bring the water to a boil, the water must boil for 10 minutes to be extra safe.
-The second pot is used to boil the lids for your jars, the portions that have rubber seals
-The third pot must be quite large and is used for the actual jam making
3) In the pot, throw the plums and sugar together, heat on medium high heat until soft, mash and mix constantly with a potato masher.
4) Once the mixture has become a rich purple colour and somewhat syrupy, add the rum, continue stirring
5) After approximately 20 minutes, the mixture should be thick, test it on a cold spoon, the texture it holds upon touching it should give you a rough approximation of what the jam will be like the next day.
6) Remove the jars and lids from the boiling water as you need them, pouring the jam into the jars and leaving half an inch of headspace between the jam and lid, quickly screw the rings onto the lids, sealing the jam.
7) Let the jam sit 24h, store in a cool dark place